Step 0 1
In 3DS Max, select the object or objects in your scene that you want to apply the material to.
Step 0 2
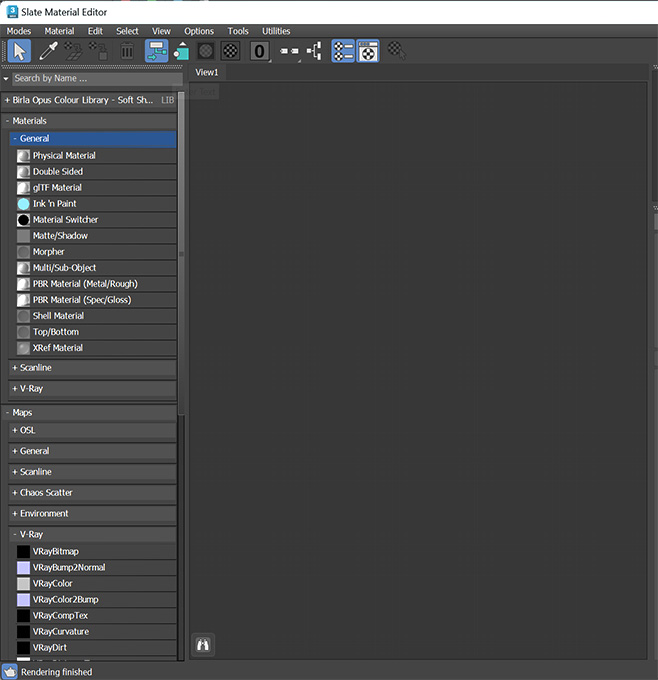
Open the Material Editor:
- Press the “M” key or go to the “Rendering” menu and select “Material Editor.”
- Under “Modes”, select “Slate material editor”.
Step 0 3
Create a New Material:
- In the Material Editor, on the left side panel, click the dropdown menu in “General” and select “PBR material (Metal/Rough)” to create a new material.
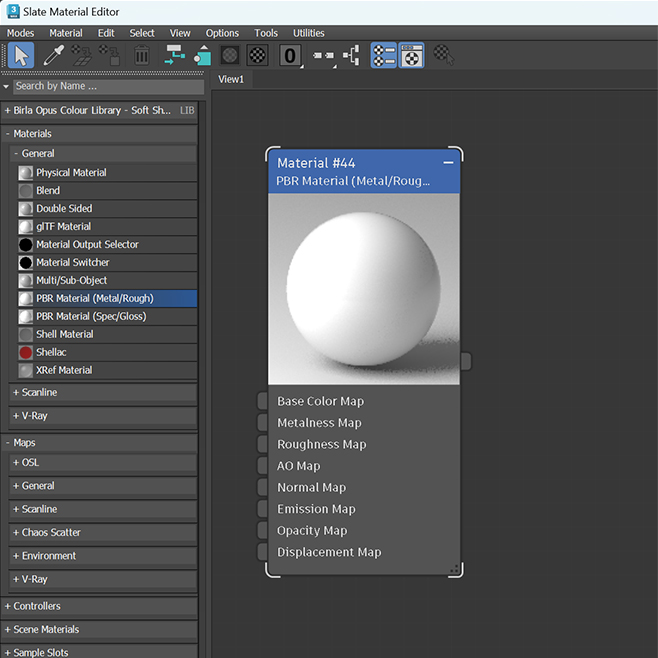
Step 0 4
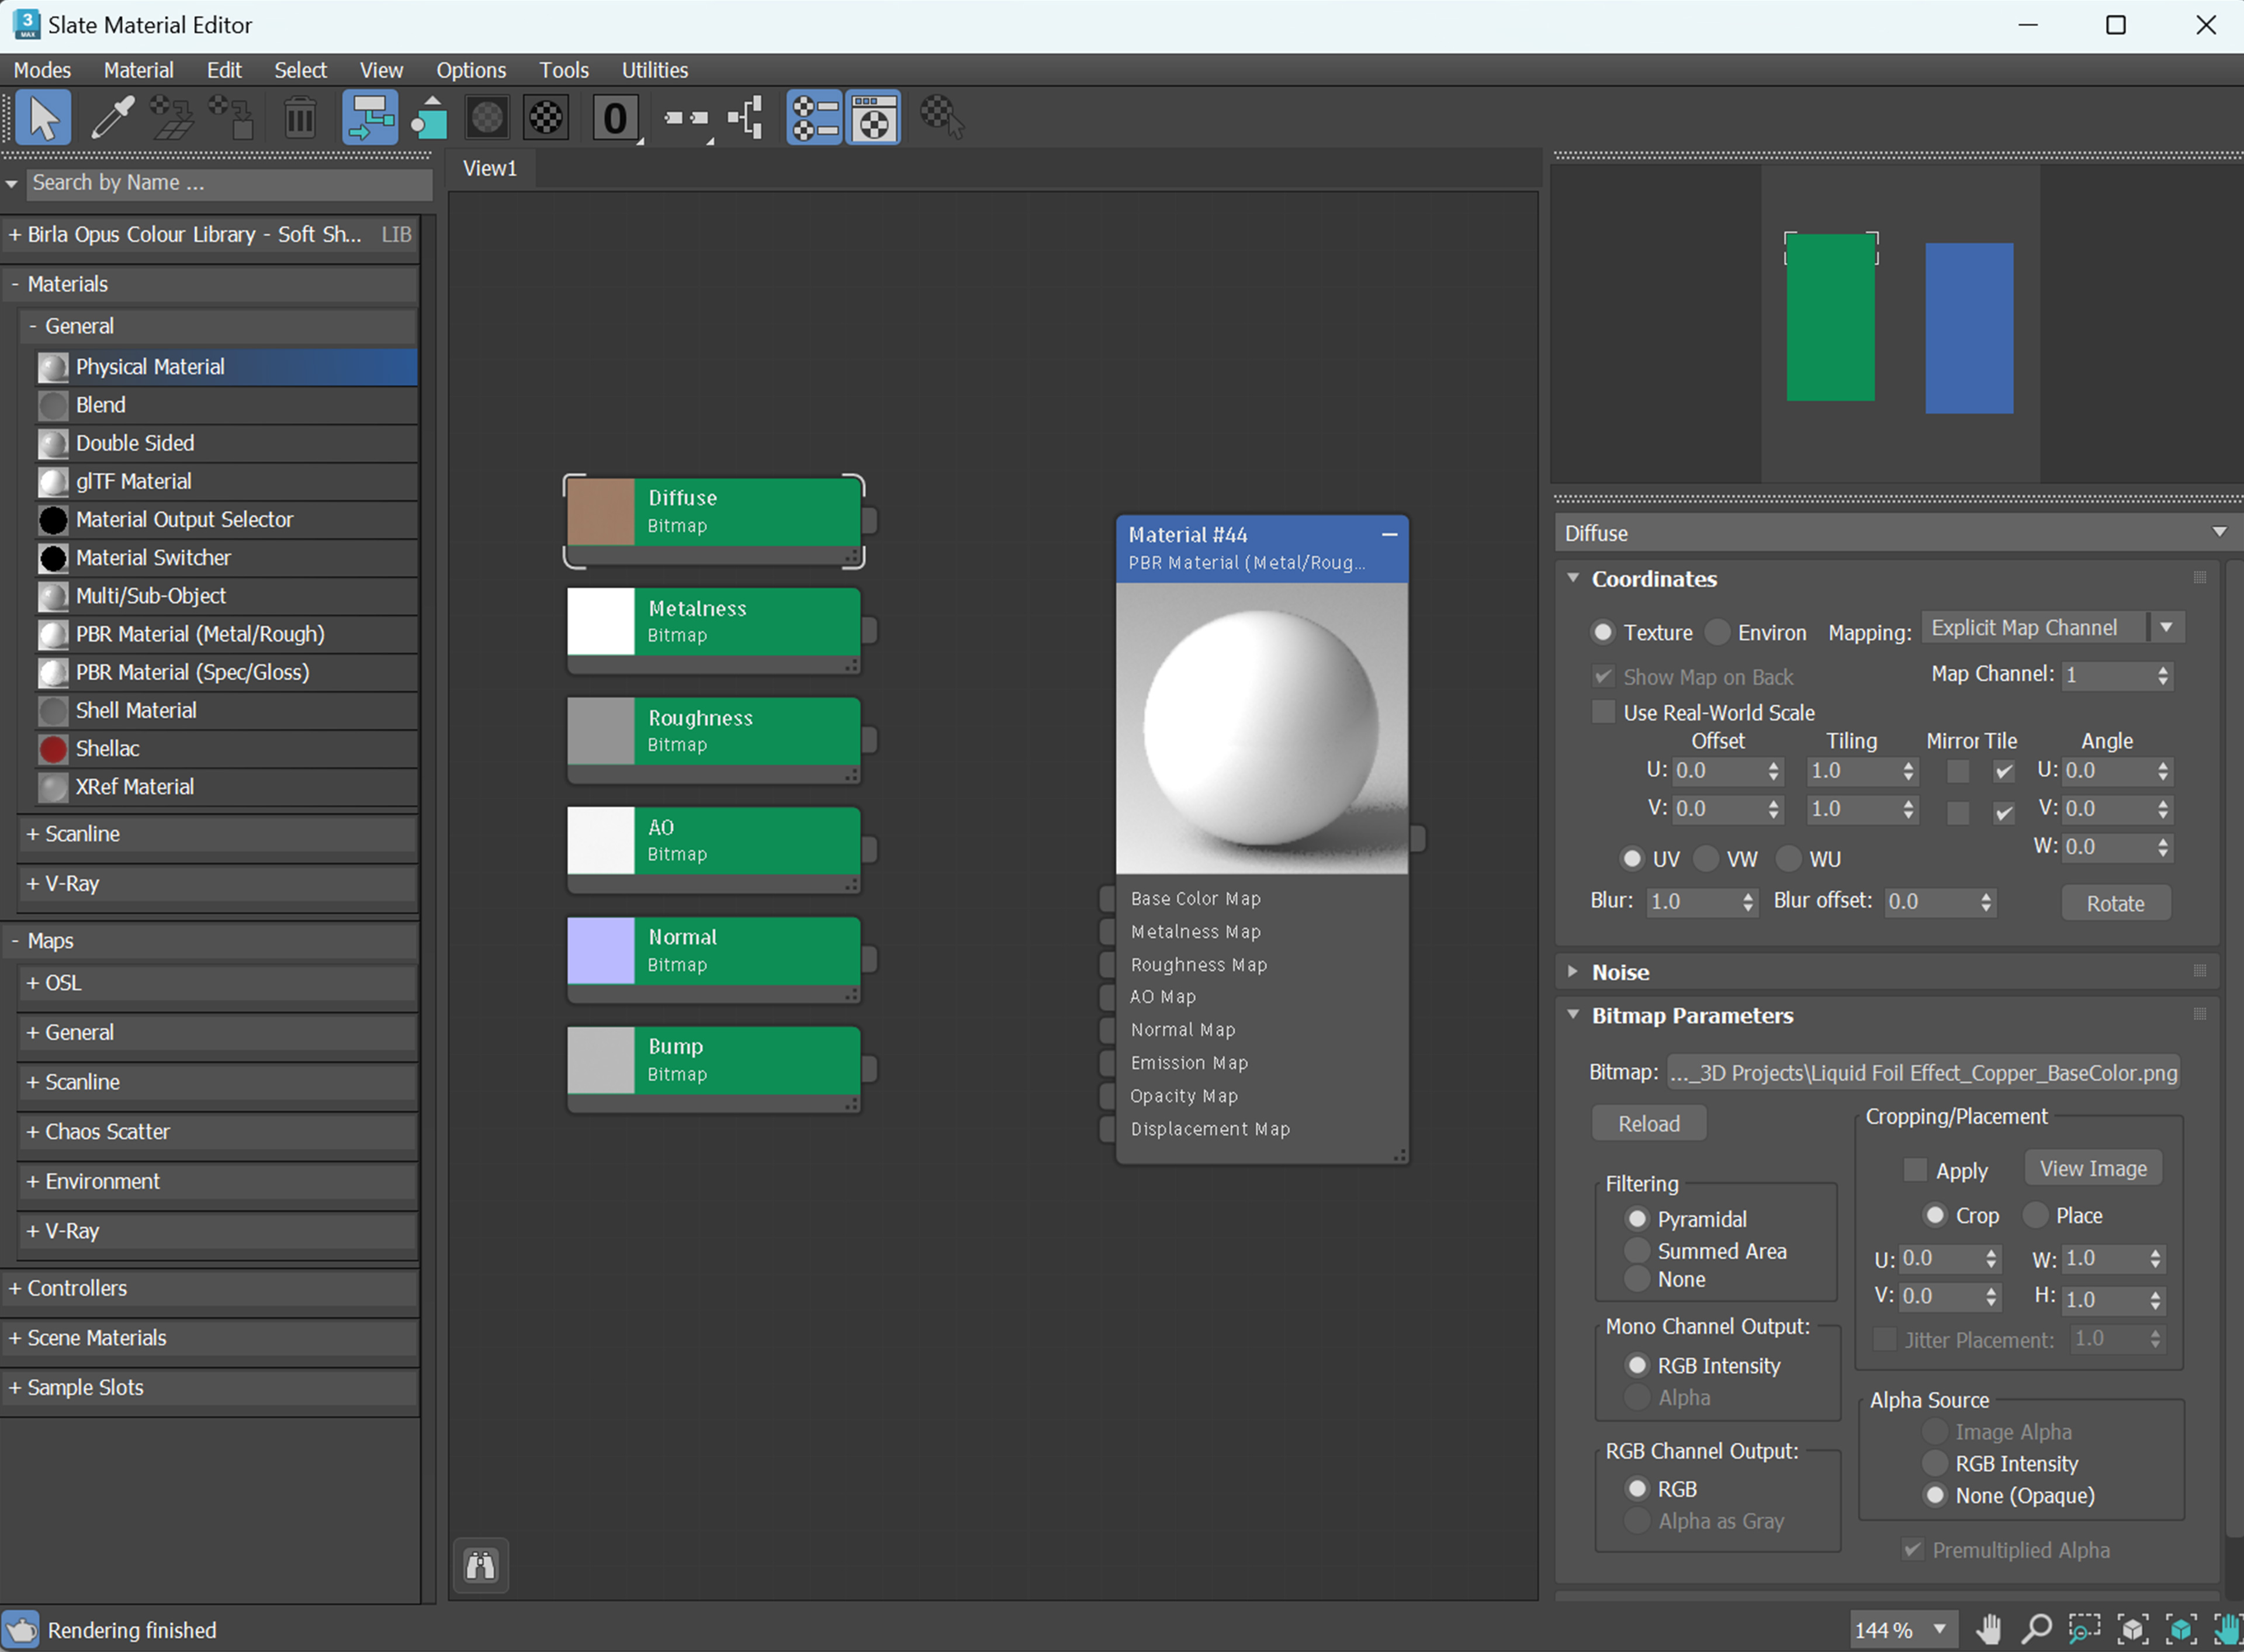
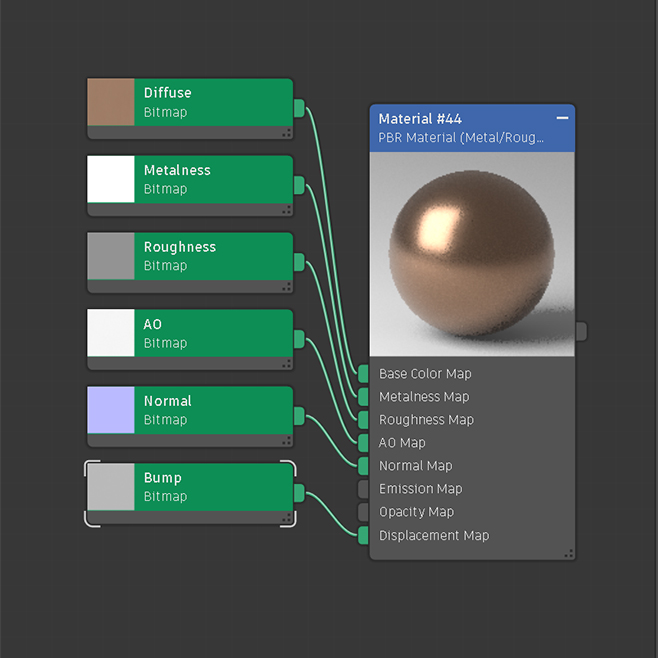
In the Slate Material Editor, you’ll need to connect the various texture maps to the appropriate input slots to create a PBR material.
Step 0 5
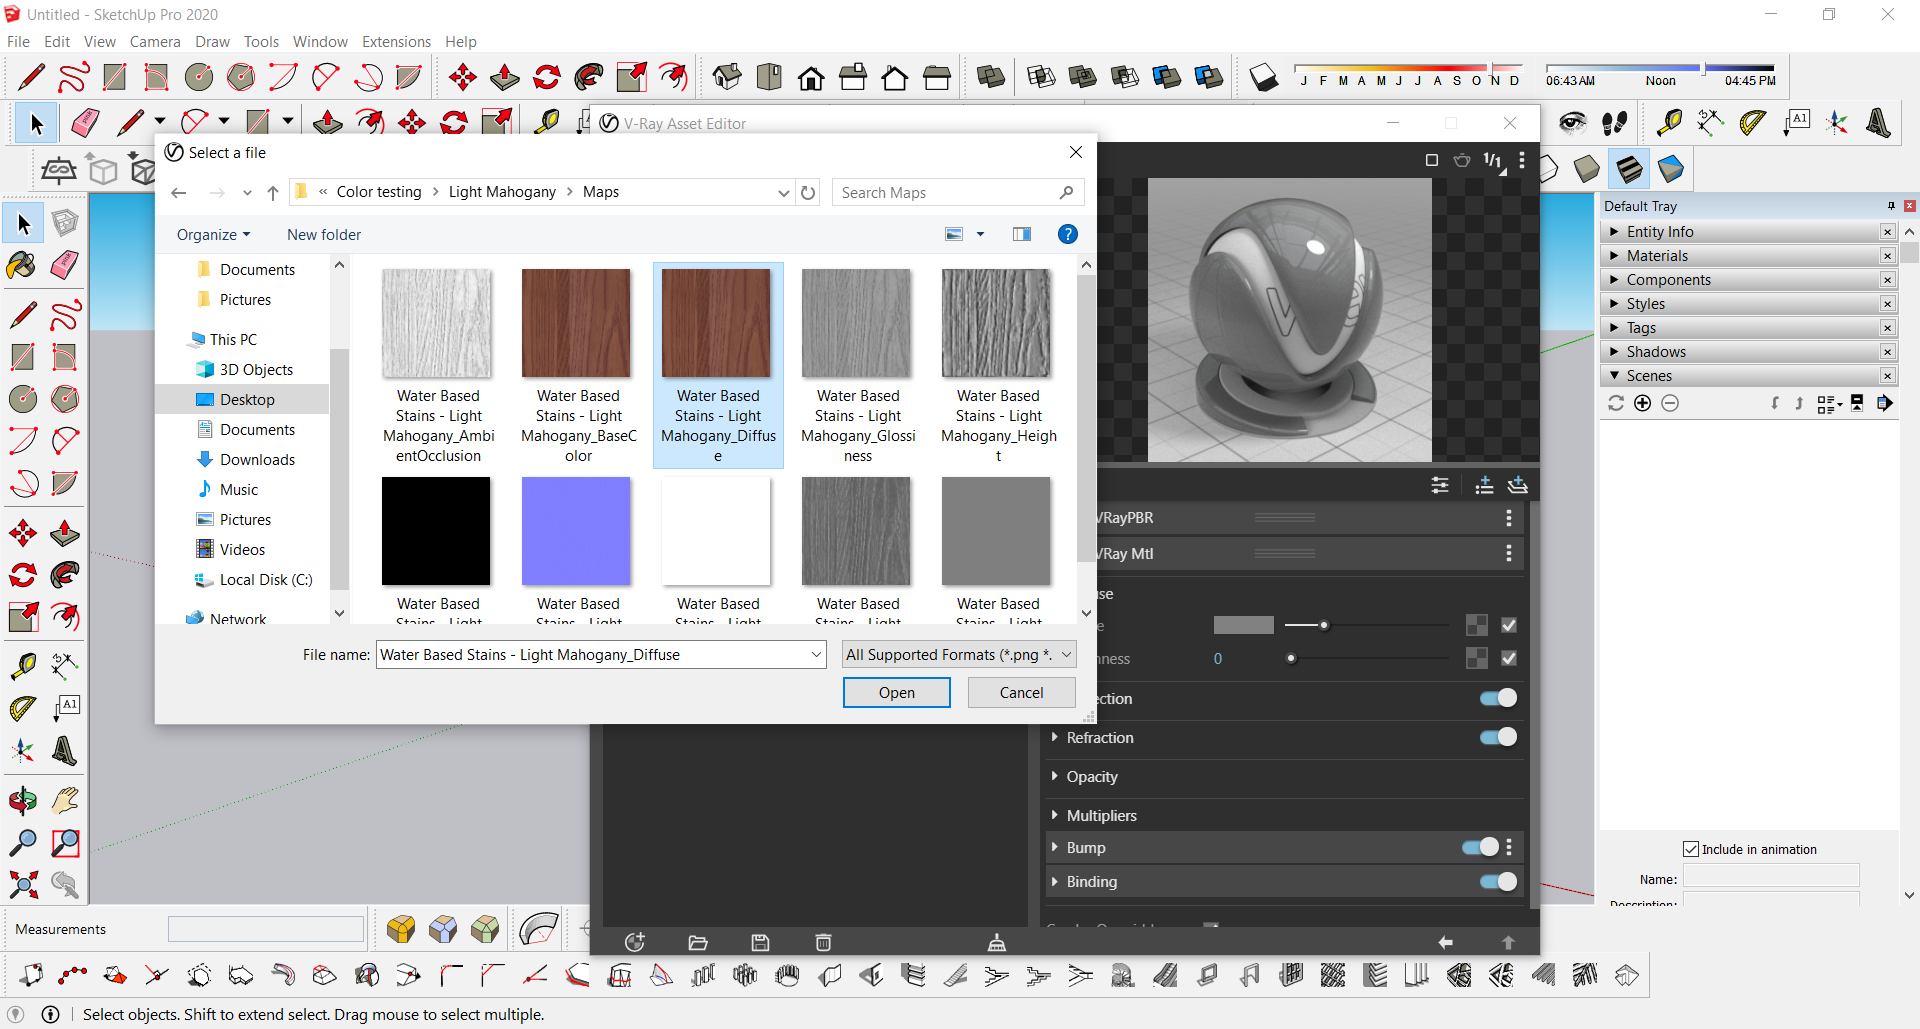
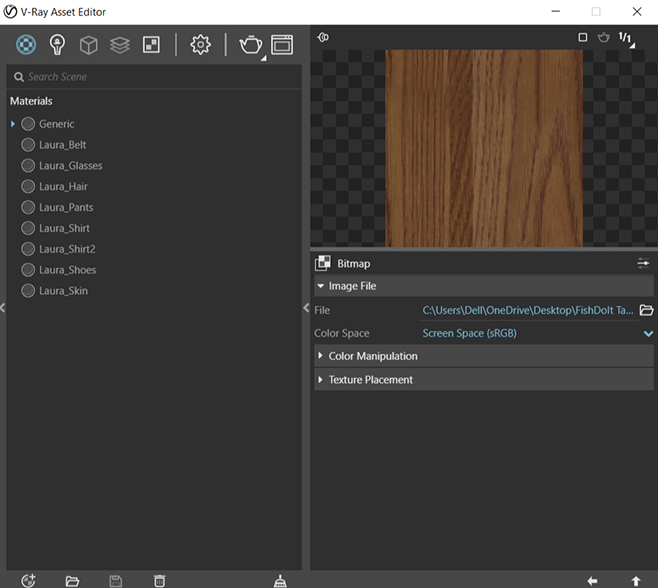
On the left panel- open “Maps” dropdown, and under “General”, select bitmap to add the texture maps to your Material editor.
Import each map to its appropriate bitmap and name them accordingly.
The texture map folder contains files like – “Texture name_Diffuse”, “Texture name_Normal”, “Texture name_Roughness”, etc.
Step 0 6
Here’s where each of your maps should go:
BaseColor -> BaseColour Map Slot
Metalness -> Metalness Map Slot
Roughness -> Roughness Map Slot
Ambient Occlusion -> AO Map Slot
Normal -> Normal Map Slot
Opacity -> Opacity Map Slot
Bump -> Bump Map Slot
Step 0 7
Go back to your scene, Make sure your object / objects are selected. Back in the Slate Material editor, right click the “PBR Material (Metal/Rough)” and click “Assign Material to Selection”.
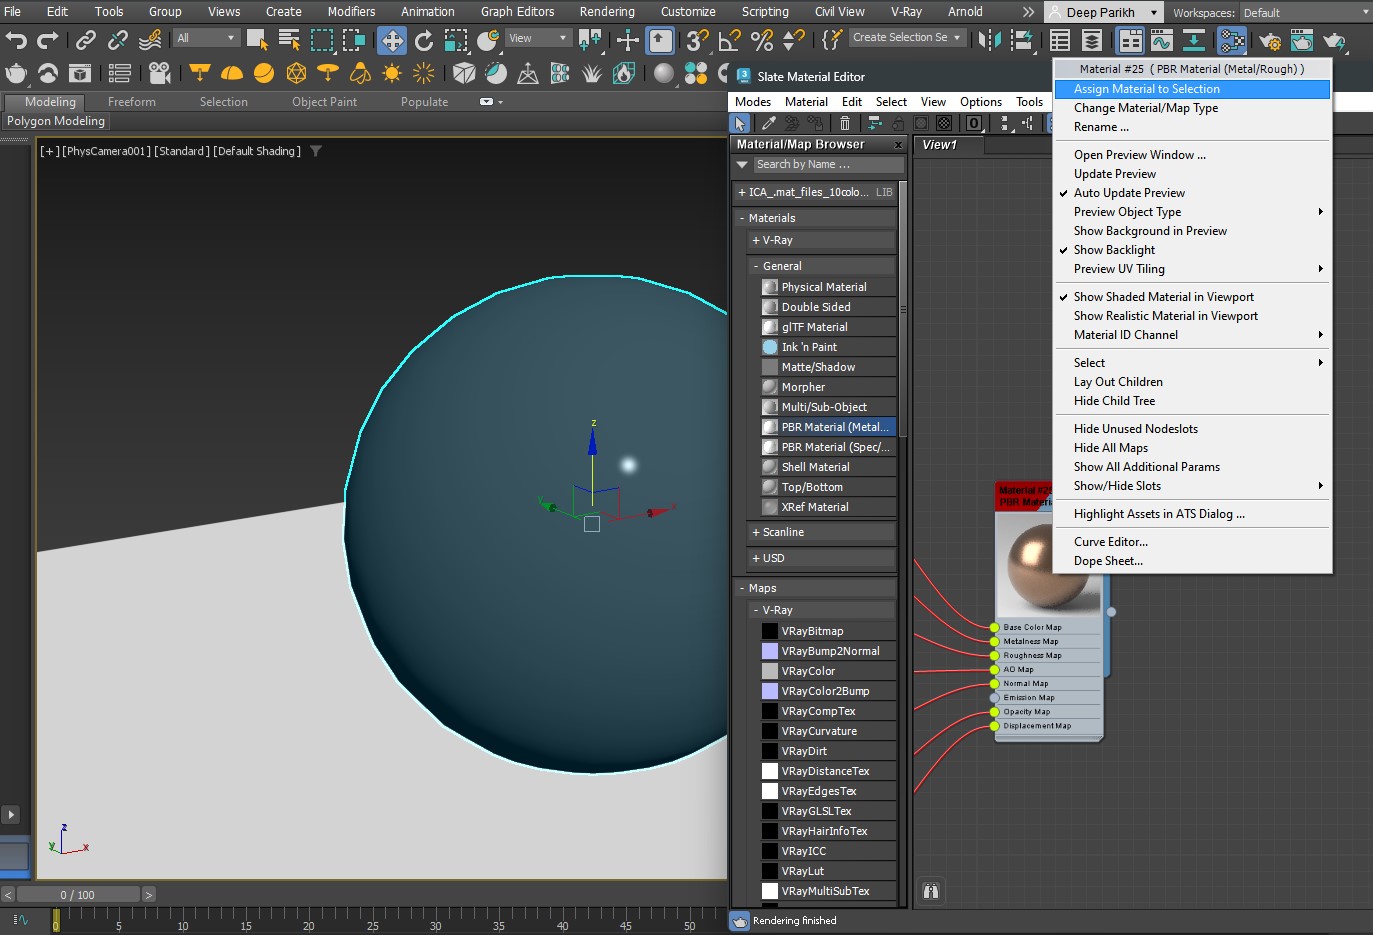
Step 0 8
Apply “UVW map” modifier and adjust the texture applied (if needed) on the object before rendering.
Step 0 9
Hit Render.